Wednesday, April 28, 2021

Crafty Challenge Blog Hop - April 2021


Welcome to the April Crafty Challenge Blog Hop! Each month a group of Stampin' Up Demonstrators from around the world get together to create cards to inspire others to make and share cards. This month our task is to use the sketch below to create our cards. I love sketch challenges because it's always so exciting to see how many different cards can be designed using the exact same sketch. We also have flexibility to use either follow the sketch exactly or to bring our own inspiration to the card we design.


I'm so excited about the new Hand-Penned Petal Bundle in the Stampin' Up Annual Catalog that will be available on May 4th! I just love the Hand-Penned Petal Stamp Set and the beautiful Penned Flowers Dies that make up the bundle. In this card, I featured the Hand-Penned Designer Series paper, Fresh Freesia, and Pale Papaya In Color cardstock. I also used the In Color Blends to color in the flowers and leaves. I added a double bow made out of Fresh Freesia and Pale Papaya Ribbon.


I hope you liked my card! You're at Sea Ranch Creations and I encourage you to "hop" along to all the other blogs to see so many awesome creations.

Happy Stamping!
Susan

Blog Hop

Sunday, April 25, 2021

Share It Sunday Blog Hop April 2021


Welcome to our April Share It Sunday Blog Hop. We are a group of Stampin' Up Demonstrators from around the world that post cards and projects once a month to inspire others in their card making process. I really like this Blog Hop because we are allowed to select any theme to make our cards and projects.

This month I want to share three cards that I made using the Sweet Ice Cream Stamp Set, Ice Cream Builder Punch, Triple Banner Punch, and Ice Cream Corner Designer Series paper. 

For each card, I used the same cardstock (Terracotta Tile and Bumblebee), Ice Cream Corner Designer Series paper, Bumblebee Ribbon, and colored Rhinestones using the Terracotta Tile blends. I designed the cards using three different sketches! It was fun to see how easy it is to use three different sketches to make cards. 

Please leave a comment to let me know which sketch you like best? Indicate whether you like the card on the left, center, or right. 

You are on Sea Ranch Creations blog! This is a blog hop so please "hop" along to see the wonderful card and project ideas shared by all the demonstrators. 

Happy Stamping!

Susan


Wednesday, April 21, 2021

Creativity Abounds Design Team Blog Hop


The Creativity Abounds Design Team is made up of 13 demonstrators from across the world and we come together each month to create exclusive tutorials and participate in a monthly Blog Hop the third Wednesday of every month.  

This month we are creating Masculine cards.  I don't know about you, but I have the most challenges creating cards for the men in my life. I want them to be special but not too cutesy.

Today I'm sharing a two page scrapbook layout featuring a nautical theme using the Sailing Home Bundle. I'm so happy this bundle will be carrying over to the new annual catalog!  

My brother and sister-in-law are taking a two week sailing trip with another couple in a 40" catamaran for my brother's birthday. I designed this scrapbook layout as I'll be making them a 6" x 8" mini album for some of the photos they take during the trip. 


To make this two-page layout:
  •  Use Pacific Point cardstock as your background (two pieces of 6.0" x 8.0").
  • Stamp a series of rope stamps from the Sailing Home Stamp Set in Pacific Point ink onto two 1.0" x 8.0" strips of Basic White cardstock.
  • Use the rope knot from the Smooth Sailing Dies and the Stampin' Cut and Emboss Machine to cut out 6 rope knots out of Pacific Point cardstock.
  • Attach the 6 rope knots on the stamped rope images on the Basic White cardstock using your favorite adhesive.
  • Attach each Basic White cardstock strip to the outer edge of each page using your favorite adhesive.
  • Cut 2 pieces of 3.0" x 4.0"  and 1 piece of 3.5" x 4.5" of Balmy Blue cardstock.
  • Use the Seabed 3-D Embossing Folder and the Stampin' Cut and Emboss Machine to emboss the three Balmy Blue cardstock pieces. These will be the mats for photos and/or journaling.
  • Attach them to the two pages using your favorite adhesive.
  • Stamp 2 sailboats (1 small and 1 large), lighthouse, and an anchor from the Sailing Home Stamp set using Pacific Point ink onto Basic White cardstock.
  • Use the Smooth Sailing Dies and the Stampin' Cut and Emboss Machine to cut out all the stamped images and the wheel.
  • Arrange and attach the stamped images across the two pages using your favorite adhesive/dimensionals.
  • Cut the lighthouse and wheel images in half. Attach each half on each page using your favorite adhesive.  
  • Tie a piece of Braided Linen Trim to the top of the anchor and place it on the page using dimensionals.
  • Stamp "Set Sail in the Direction of Your Dreams" sentiment from the Sailing Home Stamp set in Pacific Point ink onto Basic White cardstock.
  • Use the Smooth Sailing Dies and the Stampin' Cut and Emboss Machine to cut the label for the stamped sentiment all the stamped images.
  • Attach the sentiment to the top of one of the pages using dimensionals.

I made my brother a 3-D lighthouse bridge card using the Sailing Home Stamp set with the same color combination. To see the card you need to either purchase the Creativity Abounds Masculine Tutorial Bundle for $15 OR Place an order with me and you will receive a Thank You card as well as the Creativity Abounds Masculine Tutorial Bundle as a gift.  Remember to also check out the "Last Chance Product Sale" where many of the retiring products are on sale with up to 60% off. 


Thanks so much for stopping by my blog today - Sea Ranch Creations! This is a blog hop so make sure you 'hop' around to all the amazing projects on this hop! Click on the links below to visit them.

Happy Stamping!
Susan

Retiring 2019-2021 In Colors Blog Hop


Welcome to Retiring 2019-2021 In Colors Blog Hop!  We are a very enthusiastic bunch of demonstrators from around the world that love to share what we do.  Today, we are saying Goodby to  the 2019-2021 In Colors! We want to celebrate these colors before they retire! 

Here are the 2019-2021 In Colors: Pretty Peacock, Seaside Spray, Purple Posy, Rococo Rose, and Terracotta Tile!


Here are a few of my favorite cards using the 2019-2021 In Colors.

In this card I  used Pretty Peacock cardstock, the Christmas Gleaming Bundle, and the Christmas Gleaming Designer Series paper to create this Christmas Card.


I really love the Rococo Rose In Color! I've made many cards with this color and I feel like it is a friend. I know I will miss it a lot! This card was designed using the Always In My Heart Bundle, Love You Always Specialty Foil paper, and True Love Designer Series paper. I colored the flowers with the Rococo Rose Blends.


This card features the Hydrangea Haven Bundle and the Hydrangea Hill Designer Series paper. I used Seaside Spray cardstock for the second layer of the card and to cut out the detailed hydrangea flower. Then I used the Purple Posy cardstock to stamp the sentiment.


Place an order with me and you will recieve a Thank You card as well as the Creativity Abounds Masculine Tutorial Bundle as a gift.  Remember to check out the "Last Chance Product Sale" where many of the retiring products are on sale.  

The Creativity Abounds Design Team is made up of 13 demonstrators from across the world and we come together each month to create exclusive tutorials and participate in a monthly Blog Hop. 


Thanks so much for stopping by my blog today - Sea Ranch Creations! This is a blog hop so make sure you 'hop' around to all the amazing projects on this hop! Click on the links below to visit them.

Happy Stamping!
Susan


Saturday, April 17, 2021

Casually Crafting Design Team Blog Hop April 2021


Our group challenge this month is to create a card using the sketch below. 


I really like sketch challenges so I decided to use the Sweet Strawberry Bundle that includes an awesome stamp set and the Strawberry Builder Punch. I used Garden Green cardstock as my card base and Granny Apple Green as the complementary cardstock. I also used two circle punches: 2 inches and 1.5 inches to create the card.

I punched out a 2" circle on the left-hand side of the Granny Apple Green cardstock and placed a piece of Berry Blessing Designer Series paper behind the circle. Then I punched out a 1.5 circle of Garden Green to attach the two strawberries I made using the Strawberry Builder Punch. I stamped the "That Was So Sweet Of You" Sentiment out of Real Red ink onto a piece of Basic White cardstock that was punched with the label. I added a piece of Real Red Satin Ribbon to the back of the label beofre attaching it to the card using dimensionals.


For the inside of the card I added a piece of Granny Apple Green cardstock, stamped a leaf using Garden Green ink and punched out another strawberry with stem. I hope you use this sketch to make your own card. It was a lot of fun.

You are on the Sea Ranch Creations blog - please hop to the other sites to see lots of amazing projects.

Happy Stamping!

Susan


Thursday, April 15, 2021

Memory Keeping Blog Hop - April 2021


We're a group of Stampin' Up Demonstrators from around the world participating in a Memory Keeping Blog Hop to share different memory keeping projects that we hope will inspire you as you gather your memories. Scrapbooking allows you to let your creative juices flow as well as documenting the important moments in your life. 

Today I'm sharing a two page scrapbook layout featuring a nautical theme using the Sailing Home Bundle. I'm so happy this bundle will be carrying over to the new annual catalog! 


To make this two-page layout:
  •  Use Pacific Point cardstock as your background (two pieces of 6.0" x 8.0").
  • Stamp a series of rope stamps from the Sailing Home Stamp Set in Pacific Point ink onto two 1.0" x 8.0" strips of Basic White cardstock.
  • Use the rope knot from the Smooth Sailing Dies and the Stampin' Cut and Emboss Machine to cut out 6 rope knots out of Pacific Point cardstock.
  • Attach the 6 rope knots on the stamped rope images on the Basic White cardstock using your favorite adhesive.
  • Attach each Basic White cardstock strip to the outer edge of each page using your favorite adhesive.
  • Cut 2 pieces of 3.0" x 4.0"  and 1 piece of 3.5" x 4.5" of Balmy Blue cardstock.
  • Use the Seabed 3-D Embossing Folder and the Stampin' Cut and Emboss Machine to emboss the three Balmy Blue cardstock pieces. These will be the mats for photos and/or journaling.
  • Attach them to the two pages using your favorite adhesive.
  • Stamp 2 sailboats (1 small and 1 large), lighthouse, and an anchor from the Sailing Home Stamp set using Pacific Point ink onto Basic White cardstock.
  • Use the Smooth Sailing Dies and the Stampin' Cut and Emboss Machine to cut out all the stamped images and the wheel.
  • Arrange and attach the stamped images across the two pages using your favorite adhesive/dimensionals.
  • Cut the lighthouse and wheel images in half. Attach each half on each page using your favorite adhesive.  
  • Tie a piece of Braided Linen Trim to the top of the anchor and place it on the page using dimensionals.
  • Stamp "Set Sail in the Direction of Your Dreams" sentiment from the Sailing Home Stamp set in Pacific Point ink onto Basic White cardstock.
  • Use the Smooth Sailing Dies and the Stampin' Cut and Emboss Machine to cut the label for the stamped sentiment.all the stamped images.
  • Attach the sentiment to the top of one of the pages using dimensionals.
Thanks so much for stopping by my blog today - Sea Ranch Creations! This is a blog hop so make sure you 'hop' around to all the amazing projects on this hop! Click on the links below to visit them.

Happy Stamping!
Susan


Monday, April 12, 2021

Monthly Blog Hop - April 2021

 Welcome to the April Blog Hop!


Thank you for joining us for Kylie's Demonstrator Training Program Monthly Blog Hop! We are so happy that you could visit us today for this blog hop for ideas and creative inspiration. We are a group of Stampin' Up!® Demonstrators from around the world that are taking part in a monthly blog hop.

My Customer Thank You card this month features the new 2021-2023 In Colors and the Color & Contour Bundle. I really love this bundle. The Color & Contour Stamp Set is awesome and I really like the Scalloped Contour Dies that can be used to cut out flowers as well as to make incredible mats for your cards.

For each card, I  stamped the flower image and the "Thank you for Everything" sentiment from the Color & Contour Stamp Set with one of the In Color inks. Then I used the Scalloped Contour  Dies to cut out two mats - the outer mat in the featured color and another mat cut out of Basic White cardstock. I also used one of the dies to cut out the stamped flower. Then I tied a bow out of the In Color ribbon and attached it to the stem of the flower with glue dots.  


In Colors: Evening Evergreen, Pale Papaya, Fresh Freesia, Soft Succulent, and Polished Pink. Here is a closer image of the colors...

Pale Papaya and Soft Succulent


Polished Pink and Fresh Freesia


Evening Evergreen


I'm still trying to decide which color(s) are my favorite. Which one do you like best? 

Place an order with me in April and you will recieve one of these In Color Thank You cards as well as the Creativity Abounds Hydrangea Hill Tutorial Bundle as a gift.  Remember to check out the Last Chance Product Sale where many of the retiring products are on sale.  

The Creativity Abounds Design Team is made up of 13 demonstrators from across the world and we come together each month to create exclusive tutorials and participate in a monthly Blog Hop. 


Thanks so much for stopping by my blog today - Sea Ranch Creations! This is a blog hop so make sure you 'hop' around to all the amazing projects on this hop! Click on the links below to visit them.

Happy Stamping!
Susan


Blog Hop

Sunday Scraps - Sweet Strawberry

I've  made a number of cards this week using the Berry Blessing Designer Series paper and the Sweet Strawberry Bundle. The designer series paper reminds me of gathering berries with my grandmother. We would go into the fields and eat berries while filling our buckets. Then we'd clean the berries and make pies once we got home. Such happy memories! Today, I decided to create a card using numerous scraps of the Berry Blessing Designer Series paper.


To make this card:

  • Select the focal paper
    • I selected the paper with a variety of fruit as the key focus for the card. I really like this paper and it has so many colors I knew it would be easy to use my other scraps.
  • Identify the color combination: 
    • I identified the different colors in the focal paper. 
  • Select cardstock color for cardbase: 
    • I decided to use the Basic White cardstock for my cardbase. 
  • Identify complementary papers:
    • I looked at the scraps I collected and realized I had different patterned papers in the dominate colors in the focal paper.
  • Decide on paper sizes:
    • I cut all the different patterned scraps into 1.75" x 1.75" squares. Then I cut each square into 2 triangles by cutting the paper on a diagonal with my paper trimmer.
  • Arrange paper onto cardbase:
    • I played around with the arrangement of the triangles untill I was happy with the final image.
  • Attach background layer:
    • I glued the different trainagles onto a 4.0" x 5.25" piece of Basic White cardstock. I left blank space in the center of the cardstock to attach a piece of Real Red ribbon.
  • Attach focal layer:
    • I attached my focal paper to a 2.0" x 4.25" piece of Basic White cardstock and attached it to the card using dimensionals.
  • Select a sentiment:
    • I had limited space so I decided to use the "Just for You" sentiment from the Sweet Strawberry stamp set. I stamped it on a piece of Basic White cardstock with Real Red ink and die cut it with the Stitched Dies small circle die.
  • Attach the sentiment:
    • I attached the sentiment with dimensionals.
  • Add any embellishments:
    • I added three Real Red rhinestones.
You can modify my process and use whatever scraps you have to make a beautiful card to send to someone special. If you make any card with scraps, please post it in the comment section below. I'd love to see your creations!

Thank you for checking out my blog today. Please leave a comment below or email me at ses@aquarius.family with any questions.

Happy Stamping!

Susan

#searanchcreations #stampinup #sundayscraps #sweetstrawberrybundle #cardmakingideas #handmadecards

Thursday, April 8, 2021

Stampin' Dreams Blog Hop April 2021


Welcome to Stampin' Dreams Blog Hop!  We are a very enthusiastic bunch of demonstrators from around the world that love to share what we do.  This month we're creating cards and projects to celebrate our Mothers and other significant Women In Our Lives.  

My mom is an amazing women and she has always been a significant role model in my life. She was always going 24/7. She was a devoted wife to my dad, beloved mom to three children, earned multiple college degrees, and shared her knowledge teaching as well as counselling high school students. Today, she is enjoying retirement and loves reading, kniting, quilting, and quelling. I'm very blessed to still have my mom in my life!

Mom loves flowers so there was no doubt that I'd design a card to showcase the Fine Art Floral Designer Series Paper. She also likes to receive fun fold cards so I decided to make a Slide and Lock Fun Fold Card. Here's the card I created for mom.

Click here to sign up for my mailing list and I'll send you a collection of card tutorials including this card. Each week, I email infomation about new stamping techniques or fun fold designs, virtual card classes, and updates about Stampin' Up promotions.

Thanks so much for stopping by Sea Ranch Creations today!  Make sure you 'hop' around to all the amazing projects by other demonstrators! Click on the links below to visit them.

Happy Stamping!
Susan


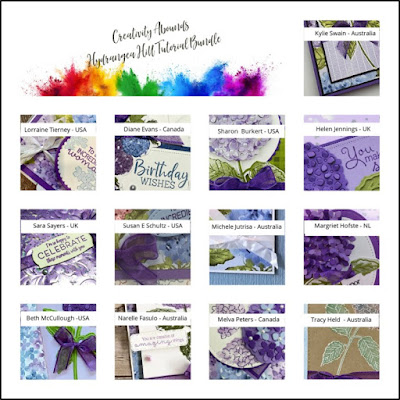
If you live in the USA and don't already have a demonstrator, I'd be honored if you place an order through my on-line storeIf you purchase $50 or more, I will mail you a handmade Thank You card and email you the Creativity Abounds Hydrangea Hill Tutorial Bundle as a free gift from me. If you are a demonstrator or not interested in buying products, you can purchase the Hydrangea Hill Tutorial Bundle for $15 email me at ses@aquarius.family

Here is a sneak peek:


Wednesday, April 7, 2021

Stampin' Up New 2021-2023 In Colors

Every year Stampin' Up introduces five new colors that will be available for purchase for only two years. So in addition to our family of colors this provides you with an opportunity to explore using some new colors every year.

So this means the the 2019-2021 In Colors - Rococo Rose, Seaside Spray, Pretty Peacock, Purple Posy, and Terracotta Tile will be retiring on May 3rd. If one of these colors is your favorite, you will want to order ink, ink refills, markers, and/or cardstock as soom as possible.

Now I want to introduce the 2021-2023 In Colors! I love the new In Colors which are Fresh Freesia, Polished Pink, Evening Evergreen, Soft Succulent, and Pale Papaya. I'm especially looking forward to playing with Fresh Freesia and Soft Succulent.

Which one do you think will be your favorite?


As a Stampin' Up Demonstrator I get to order the new In Colors ink and cardstock as well as some of the new stamp sets a whole month before the new catalog goes live to the general public on May 4th. It's one of the big perks of being a demonstrator. I also love learning and sharing with other demonstrators from around the world. It's amazing to learn about other people's cultures and traditionals. Another advantage of being a demonstrator is that you never pay full price for products - you automatically start with 20% off all products! As a member of my team you will recieve card tutorials for FREE and a discount on all my card classes. If you would like more information about  becoming a Stampin' Up demonstrator and joining my team, please email me at ses@aquarius.family.

I can't wait for my order to arrive in the next few days. I'm so ready to start playing with all of these amazing In Colors. Come back to visit my blog and see what I create.

Happy Stamping!
Susan


Tuesday, April 6, 2021

Technique Tuesday Blog Hop


Today, we'll be sharing some techniques for using the Stamparatus. I hope you'll learn some helpful tips that you'll be able to put into action when making cards.

I love using my Stamparatus to create my own designer series paper. I'll share the steps:

  • Select the stamps that you want to use for making your paper
  • Select the colors you want to use on your paper
  • Arrange the stamps on one of the plates 

I decided to use three stamps from the Sailing Home Stamp Set and three different colors - Melon Mambo, Pacific Point, and Mango Melody.


To ink each stamp in a different color, 

  • Put the plate into the Stamparatus 
  • Place the stamp set container under the plate so there is enough support to get good coverage of ink on each stamp
  • Place the paper to be stamped onto of the grid paper and secure it with the magnets


Then I pressed the plate onto the paper. The great thing about using the Stamparatus is that you can stamp multiple times until you get the perfect image.  


Then you can rotate the plates or the paper to get images on each of the corners.

The final step is to fill in an areas that seem blank. In this case, I stamped an image in the center of the designer series paper. Now I'm ready to make a card using my newly created designer series paper.


I hope you liked my tips for using a Stamparatus to create your own designer series paper. You're on the Sea Ranch Creations site - make sure you hop around to see the other techniques for using the Stamparatus! 

Monday, April 5, 2021

Last Chance Product Sale


While you're waiting for the new catalog to arrive, be sure to take advantage of the Last Chance Products Sale where you can purchase products that will be retiring on May 3rd. The sale items are only while supplies last.

Shop for retiring products at my on-line store.

If you purchase $50 or more I will send you a handmade thank you card and the Creativity Abounds tutorial that features the Hydrangea Haven bundle.

If you purchase $100 or more I will send you a handmade thank you card, the Creativity Abounds tutorial that features the Hydrangea Haven bundle as well as the Dandy Garden tutorials.

Happy Stamping!

Susan


Here are the sneek peaks for the Creativity Abounds Hydrangea Haven Tutorial Bundle


Here are some of the images from the Dandy Garden Mega Tutorial Bundle with 62 different card designs and instructions.


Stampin' Up 2021-2022 Annual Catalog

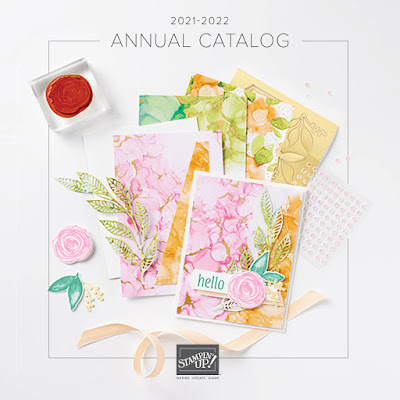
There's lots of excitment in the Stampin' Up Family as we are about to release the brand new 2021-2022 Annual Catalog. Here's a picture of the front of the catalog...isn't it beautiful!


On May 4th the new Stampin' Up Annual Catalog will be available for everyone to view. As soon as I get the new catalogs I will mail a FREE copy to all of my customers. If you live in the US and need a demonstrator I'd be glad to send you a catalog. Just email me at ses@aquarius.family

In the next few weeks I'll be showing samples on the new products on my blog.  I hope you visit my blog often to see some of the new products.

Happy Stamping!

Susan


Friday, April 2, 2021

Ice Cream Corner Blog Hop


Welcome to the Ice Cream Corner Blog Hop. We're a group of demonstrators from around the world who make cards to inspire others. Today, we'll be showcasing the the whole suite which includes the Sweet Ice Cream Stamp Set, Ice Cream Cone Builder Punch, and Ice Cream Corner Designer Series paper. 

There are lots of birthdays in my family next month so the timing of this Blog Hop is perfect for me. I  love the font on the large "Happy Birthday" sentiment on the Sweet Ice Cream Stamp set. I also really like the punch that makes a tasty looking ice cream cone with ice cream scoops. Then I realized I could also use the cone shape on the punch to make some Birthday Party Hats. 


For my card design, I created a bridge fold card and decided to add a shaker element in the center section of the card. I didn't have any of the cool sprinkles that come with this suite so I used a hole punch to make multiple colored dots as my shaker material.

Click here to sign up for my mailing list and I'll send you a collection of card tutorials including this card. Each week, I email infomation about new stamping techniques or fun fold designs, virtual card classes, and updates about Stampin' Up promotions.

Thanks so much for stopping by Sea Ranch Creations today!  Make sure you 'hop' around to all the amazing projects by other demonstrators! Click on the links below to visit them.

Happy Stamping!
Susan

Thursday, April 1, 2021

Butterfly Bouquet Blog Hop - April 2021


Thank you for joining us for our Butterfly Bouguet Blog Hop! We are so happy that you could visit us today for this blog hop for ideas and creative inspiration. We are a group of Stampin' Up!® Demonstrators from around the world that share card making ideas to inspire others.


I just love the new Butterfly Brilliance Bundle! The bundle includes the Butterfly Brillance  Stamp Set which features very detailed images of different sized butterflies and the Brillant Wings Dies which provide two sets of dies (background and detailed overlay) so you can really make an impressive card.  To make my card I also used the Butterfly Bijou Designer Series paper, foil paper, pearl embellishments, and a sentiment from the Peaceful Moments Stamp Set using white embossing powder.


Click here to sign up for my mailing list and I'll send you a collection of card tutorials including this card. Each week, I email infomation about new stamping techniques or fun fold designs, virtual card classes, and updates about Stampin' Up promotions.


If you live in the USA and don't already have a demonstrator, I'd be honored if you place an order through my on-line storeIf you purchase $50 or more, I will mail you a handmade Thank You card and email you the Creativity Abounds Hydrangea Hill Tutorial Bundle as a free gift from me. If you are a demonstrator or not interested in buying products, you can purchase the Hydrangea Hill Tutorial Bundle for $15 email me at ses@aquarius.family

Here is a sneak peek:


Thanks so much for stopping by Sea Ranch Creations today!  Make sure you 'hop' around to all the amazing projects by other demonstrators! Click on the links below to visit them.

Happy Stamping!
Susan