Monday, February 22, 2021

Crafty Challenge Blog Hop - February 2021


This month's Crafty Challenge is to create a card using the following sketch. Each person can follow the sketch exactly or they can use their own interpretation of the sketch.


As you look at the sketch think about how you might use this sketch to design a card. 

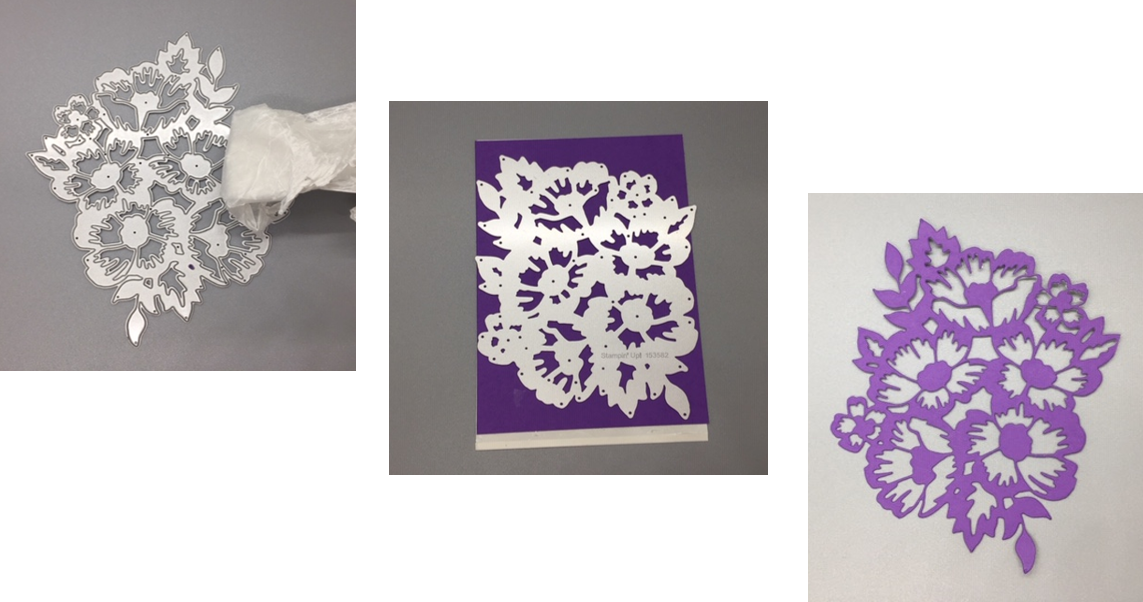
What bundle and designer series paper might you use to make a card with this sketch?


I decided to change the orientation of the Crafty Challenge sketch and to use the Garden Wishes Bundle to design this card. 


Share what you think about my card in the comments section below.


To make this card, 

  • Select a 5.50" x 8.50" Bumblebee cardstock scored and folded at 4.25" to be the cardbase.
  • Attach a 3.75" x 5.0" piece of paper with Mossy Meadow background and white leaves (Layer 3) from the Dandy Garden designer series paper to a piece of Basic White cardstock (Layer 2) using your favorite adhesive.
  • Add a 6" strip of Bumblebee Gingham Ribbonto the left side of the card.
  • Attach the Basic White cardstock (Layer 2) and Mossy Meadow background paper (Layer 3) to the cardbase using your favorite adhesive.
  • Samp the dandelion stamp from the Garden Wishes stamp set onto a piece of Basic White cardstock using the Mossy Meadow and Bumblebee ink.
  • Use the Stitched Shapes medium sized oval die and the Stampin' Cut and Emboss Machine to cut out the stamped dandelion.
  • Use the Layered Oval die and the Stampin' Up Cut and Emboss Machine to cut out a scalloped oval using Bumblebee cardstock.
  • Attach the stamped image to the Scalloped Bumblebee cardstock using your favorite adhesive.
  • Cut out a piece of paper with Bumblebee and white pattern from the Dandy Garden designer series paper.
  • Attach the Bumblebee print to the upper right hand side of the card.
  • Stamp the sentiment "Wishing You All The Best" from the Garden Wishes Stamp Set onto a 0.75" strip of Basic White cardstock using Mossy Meadow ink.
  • Cut the end of the Basic White cardstock.
  • Add a Ladybug Trinket to the sentiment.
  • Color two pearls with Bumblebee blends and attach them to the upper left hand side of the card.
Thank you for visiting my blog today and I hope you'll leave a comment in the space below. Please visit all the other demonstrators' cards by selecting the next person on the list.

Blog Hop


Sunday, February 21, 2021

Sunday Scraps - Dandy Garden paper

Hello Stamping Friends,

I've had a wonderful time using the Dandy Garden designer series paper to design numerous cards and to make card kits for my card class Tuesday night. When I went to my crafting room this morning and I saw a large number of scraps of the Dandy Garden designer series paper. Never wanting to let anything go to waste, I decided to create a card using numerous scraps of paper.  Here is the card....


Here is the process I went through to design this card

  • Select the focal paper
    • I selected the paper with multiple colored dragonflies with dandelions as the key focus for the card. I really like this paper and it has so many colors I knew it would be easy to use my other scraps.
  • Identify the color combination: 
    • I identified the different colors in the focal paper 
  • Select cardstock color for cardbase: 
    • I realized that there was just a hint of Misty Moonlight so I decided to use that colored cardstock for my cardbase and the ribbon to place in the center of the card.
  • Identify complementary papers:
    • I looked at the scraps I had collected and realized that I had different patterned papers in the dominate colors in the focal paper - Bumblebee, Calypso Coral, Blackberry Bliss, Mossy Meadow.
  • Decide on paper sizes:
    • I cut all the different patterned scraps into 1.75" x 1.75" squares. Then I cut each square into 2 triangles by cutting the paper on a diagonal with my paper trimmer.
  • Arrange paper onto cardbase:
    • I played around with the arrangement of the triangles untill I was happy with the final image.
  • Attach background layer:
    • I glued the different trainagles onto a 3.75" x 5.0" piece of Basic White cardstock. I left blank space in the center of the cardstock to attach a piece of Misty Moonlight ribbon.
  • Attach focal layer:
    • I attached my focal paper to a 2.0" x 4.25" piece of Basic White cardstock and attached it to the card using dimensionals.
  • Select a sentiment:
    • I had limited space so I decided to use the "To a True Friend" sentiment from the Dragonfly Garden stamp set. I stamped it on a piece of Basic White cardstock with Calypso Coral ink and die cut it with the Stitched Dies small circle die.
  • Attach the sentiment:
    • I attached the sentiment with dimensionals.
  • Add any embellishments:
    • I added two small dragonflies punched out of the designer series paper using the Dragonflies punch.
You can modify my process and use whatever scraps you have to make a beautiful card to send to someone special. If you make any card with scraps, please post it in the comment section below. I'd love to see your creations!

Thank you for checking out my blog today. Please leave a comment below or email me at ses@aquarius.family with any questions.

Happy Stamping!
Susan

#stampinup #dandygardenpaper #dragonfliespunch #searanchcreations

Wednesday, February 17, 2021

Creativity Abounds Blog Hop - February 2021


Welcome to the Creativity Abounds Design Team's February Blog Hop! 

We are a group of talented Stampin’ Up!® Demonstrators from around the world that are coming together to share our creative ideas with you. We are happy that you can join us and hope that we can inspire you to make creations of your own.


This month the Design Team is featuring the Dandy Garden Suite. This suite consists of two different bundles (stamp sets -one with dragonflies punch and the other with dies) as well as the beautiful Dandy Garden designer series papers.


I created my card using a Dandy Garden Card Base, the Dragonfly Garden Bundle, the Dandy Garden designer series paper, Rainbow Glimmer paper, Rhinestones, and a very cute ladybug to embellish the card.


I really love the new Rainbow Glimmer paper. The colors are amazing and it looks like glitter paper but it does not get all over your hands and everything else. I punched the two large dragonflies out of the Rainbow Glimmer paper using the punch. Then I stamped the dragonfly image on the punched out images in Basic Black ink to highlight the details of the dragonfly body and wings. I also added rhinestones on the back of each dragonfly and a super cute ladybug trinket on the sentiment. 


Download my Tutorial if you'd like to make this card. The tutorial includes a list of all the supplies, measurements in both Metric and Imperial, as well as the instructions for making the card. 


If you live in the USA and don't already have a demonstrator, I'd be honored if you place an order through my on-line store. For every $50 you make in purchases you can earn a SALE-A-BRATION reward until Feb 28th from Stampin' Up! ®.

If you purchase $50 or more from my on-line store, I will mail you a handmade Thank You card and email you the Creativity Abounds Dandy Garden Tutorial Bundle as a free gift from me. If you are a demonstrator or not interested in buying products, you can purchase the Dandy Garden Tutorial for $15 just email me at ses@aquarius.family

Here is a sneak peek:


You are on Susan Schultz's Sea Ranch Creations blog. You may be starting here or have come from someone else's blog - see the list below to help you to visit all the different demonstrators' blogs and get many amazing ideas. We all have our country listed - so if you are looking for a demonstrator in your country, these demonstrators would love to look after you with your Stampin' Up!® shopping or if you would like to join our Stampin' Up!® teams.

Thank you so much for checking out our February Blog Hop!
Susan

BLOG HOP


Sunday, February 14, 2021

Happy Valentine's Day

Happy Valentine's Day!

I'm so fortunate to share that I've been married to the love of my life and very best friend, David, for the last 38 years. He is such a wonderful and loving man!  Here is the special card I made for him for Valentine's Day. 


The card really says it all! We try to have some special time together every day. It's much easier now that we are retired and our adult son is happily pursuing his dream of graduate school. I hope you let everyone you love know how special they are every single day!


Friday, February 12, 2021

Creativity Abounds Day of Inspiration


Come join the Creativity Abounds Design Team for a FREE Day of Inspiration on Saturday, February 13 from 8am to 5pm PST.  We're a group of Stampin' Up! Demonstrators from around the world and we will each create cards or projects with different stamp sets throughout the day. 

The Agenda:

8:00        Welcome by Creativity Abounds Design Team

9:00         Susan Schultz - USA - Berry Blessings

10:00       Sharon Burkert - USA - Snail Mail

10:30       Beth McCullough - USA - In Bloom

11:00       Melva Peters - Canada - Hey Birthday Chick

12:00       Helen Jennings - United Kingdom - Hydrangea Hill

1:00         Lorraine Tierney - USA - Fine Art

2:00         Diane Evans - Canada - Hey Chick

3:00         Narelle Fasulo - Australia - Ice Cream

4:00         Kylie Swain - Australia  - Love You Always

5:00        Wrap Up and Prizes

Each demonstrator will begin their presentation on the hour except Beth who will be at 10:30. We will present a card or project idea for a specific Stampin' Up! bundle for approximately 20 minutes. Then you can make a similar card or project using your own supplies or take a break.  Be sure to tune in for the next presentation.

I will be giving out a few prizes to my customers -so please make sure you comment on the different presentations throughout the day.

How To Sign Up

Click on this link  Creativity Abounds Day of Inspiration | Facebook

You will be asked to give name of your demonstrator - just give my name Susan Schultz

You will be approved.

Please sign up today so you'll be ready to go for tomorrow's session.

I hope to see all of you tomorrow!
Susan


Tuesday, February 9, 2021

Technique Tuesday Blog Hop (Feb, 2021)


Thank you for joining us to share different Die Cutting Techniques. I really love all the Stampion' Up! dies because they are so detailed.  It's amazing how the use of dies can add a huge wow to the simpliest card.  When I first started I had a lot of trouble getting the dies to cut the cardstock and to punch out all the little pieces out of the die. My other challenge was to try to put glue on the back of any detailed die to attach it to the card.  If either of these challenges sound familar to you, I have some two suggestions: wax paper and adhesive sheets!

Let me share how to use wax paper and adhesive sheets to improve your die cutting experiences. I was making a number of card kits using the Many Layered Blossoms Dies for an upcoming virtual card class. I love the Many Layered Blossoms Dies as they are incredibly detailed and you can use any color combination to make an amazing card. 

Here's one of the cards:

In the past I've tried many different techniques that didn't work, but I've had lots of success using wax paper. I've found the best way to get a good clean cut with the dies is to rub the cutting side of every part of the die with waxed paper before I place it on the cardstock. The wax on the edges of the die helps to cut the paper. If I'm making many cuts with the same die, I rub it with wax paper before each cut. To attach the flower bouquet for this card, I used adhesive sheets. 

These are so simple to use, so just give it a try. 

  • Cut the adhesive sheet and cardstock a little larger than the die you intend to use.
  • You peel off one side of the adhesive sheet
  • Place the peeled side of the adhesive sheet onto the cardstock or designer series paper that you wish to cut
  • Rub the cut edge of the die with wax paper 
  • Arrange the die on top of the cardstock with the adhesive sheet attached to the bottom
  • Put the die, cardstock, and cutting plates through your Stampin' Cut and Emboss Machine and remove the die cut with adhesive sheet on the back of the cardstock


  • Attach the die to your card by gently peeling back the other piece of paper  on the back side of the die that will expose the adhesive material to a portion of the card front.
  • Gentle pull back the adhesive while making sure the die is attaching to the card until the whole die is on the card front.
I hope my tips for die cutting and attaching die cuts to your cards were helpful.

Remember for any $50 or more purchase you make before February 28th, you will earn a Sale-A-Bration reward.  If you'd like to make a $50 or more purchase, please click here to shop at my on-line store.  Use my host code 7N7AGJJG and I will mail you a Thank You card and email you the Dandy Garden MEGA Tutorial Bundle as my gifts to you. 

Please check out the valuable tips from other demonstrators on this blog hop.

Monday, February 8, 2021

Monthly Blog Hop (February, 2021)


                                 Welcome to Our February Blog Hop

               Dragonfly Garden Bundle Accordian Fold Card


Thank you for joining us for our Stampin' Up!® Demonstrator Training Program Monthly Blog Hop! We are so happy that you could visit us today for this blog hop for ideas and creative inspiration. We are a group of Stampin' Up!® Demonstrators from around the world that are taking part in a monthly blog hop.

It's Sale-A-Bration Time at Stampin' Up! with lots of wonderful FREE products you can earn with a $50 or $100 purchase!  

I'm excited to share an accordian fold card made with the Dragonfly Garden Bundle.  I originally learned how to make this type of card from Diane Evans who uses 12 x 12 cardstock to make her beautiful cards.  I didn't have any 12 x 12 cardstock so I changed the dimensions to make this with 8.5" x 11.0" cardstock.  It's really quite simple.

                                                        
Once you take the band off the card, it opens up to provide lots of space for writing messages. It's the perfect style card for a group of people to send to someone for a birthday, thank you, or any occassion.

 Anyone who places a $50 or more order with me this month will receive:
  •  My Thank You card
  • The Dragonfly Garden Accordian Fold Card Tutorial for making this card
  • The Dandy Garden MEGA Tutorial Bundle including 62 card designs from demonstrators from across the world (see below)
  • Stampin' Up Sale-A-Bration reward.

Please order the Dragonfly Bundle, designer series paper, other embellishments or other Stampin' Up! products here on my on-line store and use the Host Code 7N7AGJJG.

Thanks so much for stopping by today! This is a blog hop so make sure you 'hop' around to all the amazing projects on this hop! Click on the links below to visit them.

Blog Hop


Dandy Garden MEGA Tutorial Bundle - Free with $50 purchase from my on-line store.


Monday, February 1, 2021

Explore the Blossoms in Bloom Bundle

Come explore the Blossoms in Bloom Stamp Set and the Many Layered Blossoms Dies. I enjoy using this bundle because it inspires me to create cards with beautiful blossoms for any occasion at any time of year. Even better - You’ll receive a 10% discount when you buy the bundle and also earn a reward from the Sale-A-Bration Booklet!  If you'd like to purchase this bundle, click here.


My favorite thing about the Blossoms in Bloom Bundle is the simple watercolor effect. Painting with standard watercolors can be tricky, but with the Blossoms in Bloom Bundle, achieving the artistic look of watercolor is a breeze! 


Although the watercolor effect is my go-to, you can create a variety of different looks using the Many Layered Dies. If you’d like to discover what else you can do with the Blossoms in Bloom Bundle, let me know! I’d love to see what you’d create with this set


I'll be featuring this Blossoms in Bloom Bundle on one of the cards in my February 9th Virtual Card Class. This month we will make 4 beautiful cards with different sentiments for Happy Birthday, Get Well, Thinking of You, and Thank You. I mail you the card kits, tutorials, and zoom information for the class. The cost of the class is $25 which includes shipping. Deadline for participating is February 3rd so I can mail the materials to you. Sign up for the class here

Remember you’ll receive a 10% discount when you buy the bundle and also earn a reward from the Sale-A-Bration Booklet!  You will also receive a FREE Creativity Abounds Tutorial Bundle featuring 13 card designs using the Dandy Garden suite.  If you'd like to purchase this bundle, click here.