Sunday, March 28, 2021

Share It Sunday Blog Hop March 2021


Welcome to our March Share It Sunday Blog Hop. We are a group of Stampin' Up Demonstrators from around the world that post cards and projects once a month to inspire others in their card making process. 

During the week I create a lot of cards for different blog hops and design cards for my virtual classes. I save all the left over materials from making cards each week and every Sunday I design a card that uses up some of the "scraps".  Here is my card for this week....


The card base is made with a 5.5" x 8.5" (14.9 cm x 21.0 cm) piece of Seaside Spray cardstock folded in half. This color is retiring soon and I will really miss it as it's such a beautiful, soft blue. I attached different sized strips of Hydrangea Hill Designer Series paper and cardtock (Highland Heather, Gorgeous Grape, and Seaside Spray at an angle to a piece of 4.0" x 5.25" (10.0 cm x14.4 cm) Basic White cardstock. I attached the Basic White to the Seaside Spray card base. I had a left over sheep that I had stamped on Basic White using the Springtime Joy Stamp Set and colored the flowers with Seaside Spray and Highland Heather markers. I stamped the sentiment from the Hydrangea Haven Stamp Set using Goregous Grape ink onto a piece of scrap Purple Posy using the Stitched So Sweetly Dies. I added some rhinestones to the flowers and a bow made out of Gorgeous Grape Sheer Ribbon. I think it turned out pretty well especially since I was able to use up many of my scraps.

If you like my card please leave a comment. You are on Sea Ranch Creations blog and see the list below to hop to other wonderful card and project ideas. 

Happy Stamping!

Susan

Saturday, March 27, 2021

Paper Pumpkin Blog Hop - March 2021


Here is this month's Paper Pumpkin Kit. Each kit comes with all the card materials, die cuts, envelopes, stamps, ink spot, and instructions for making cards. This month's kit also came with two gifts - a set of stencils and a sponge for applying ink to the stencils.


I took the materials from the March 2021 Paper Pumpkin kit and used a few additional products to create two alternative card designs. 

The first alternative is a gate card: 

  • Cut a 4.25" x 11.0" piece of Pretty Peacock cardstock scored at 2.75" on each end. Use a bone folder to make a good crease on the score lines. This is your basecard.
  • Use the Everygreen Forest Embossing Folder and the Stampin' Cut and Emboss Machine to emboss trees onto a 4.0" x 5.25" piece of Pear Pizzazz cardstock. 
  • Cut the Pear Pizzazz cardstock in half and attach each piece to the two flaps of the gate card using your favorite adhesive.
  • Cut out the image on the Calypso Coral cardstock leaving a 0.25" border around the image.
  • Stamp the "Here's to you" sentiment in Terracotta Tile ink onto the bottom of the image.
  • Attach the Pretty Peacock tree dies to the front of the card using your favorite adhesive.
  • Attach The image to the left-hand side of the card front using dimensionals.
  • Tie a double bow with the twine from the kit and attach it to the front of the card using glue dots.
  • Cut a 4.0" x 5.25" piece of Calypso Coral cardstock and attach it to the inside of the card using your favorite adhesive.
  • Add a 1.0" x 5.25" strip of the designer series paper with the flowers to the bottom of the Calypso Coral cardstock using your favorite adhesive.


For the second alternative I made an easel card.


  • Cut a 4.25" x 11.0" piece of Terracotta Tile cardstock and score at 3.0" and 5.50". Use the bone folder to make a crisp fold at both scorelines.
  • Tie the twine around the bottom of the cloud and trees image about three times and secure it on the back of the designer series paper.
  • Attach the Pretty Peacock Tree Dies to the front of the cloud and trees image using dimensionals.
  • Attach the cloud and trees image to a 4.0" x 5.25" Pretty Peacock cardstock using your favorite adhesive.
  • Attach the Pretty Peacock to the bottom section of the front of the card.
  • Tie a double bow out of twine and attach it to the fron of the image with a glue dot.
  • Stamp "Congratulations" onto the Basic White tab using Terracotta Tile ink.
  • Attach the sentiment to the front of the image using dimensionals.
  • Cut a 4.0" x 5.25" Pretty Peacock cardstock and attach it to the inside of the card using your favorite adhesive.
  • Attach a 3.75" x 5.0" Basic White cardstock to the Pretty Peacock cardstock using your favorite adhesive.
  • Attach a 1.0" x 3.75" strip of flower designer series paper using your favorite adhesive.
  • Stamp the "May your journey through life take you to many new and exciting places" onto a piece of Basic White cardstock using Terracotta Tile ink.
  • Attach it to the top of the flower designer series paper using dimensionals.

You are on Susan Schultz's Sea Ranch Creations blog. You may be starting here or have come from someone else's blog - see the list below to visit all the different demonstrators' blogs and get many amazing ideas. 

Thank you so much for checking out our March 2021 Paper Pumpkin Blog Hop!
Susan


Wednesday, March 24, 2021

SALE: Stampin' Up Annual Catalog Retiring Products


Hello Stamping Friends,

Today, Stampin' Up released the list of products that will be retiring from the Annual Catalog. Some of the items are also on SALE up to 60% while supplies last!!!

To see the photos of the products and items on SALE go to my online store and click on Last Chance Product Sales.

Please email me at ses@aquarius.family if you have any questions and I'll be glad to help.

Happy Stamping!

Susan

Monday, March 22, 2021

Crafty Challenge Blog Hop - March 2021


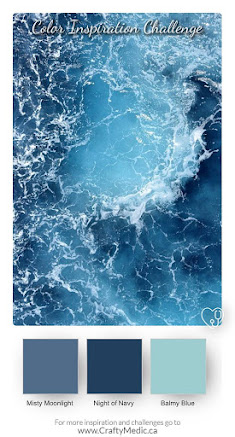
Welcome to the March Crafty Challenge Blog Hop. We're a group of demonstrators from around the world who make cards to inspire others. This month's Crafty Challenge Blog Hop features three water related colors: Balmy Blue, Misty Moonlight, and Night of Navy in honor of the World Water Day on March 22.


I decided to use the Whale Done Stamp Set and Whale of a Time Designer Series paper to create my gate card. I used Night of Navy for the card base, added a piece of designer series paper that features Balmy Blue, and used Misty Moonlight ink for the sentiments as well as Misty Moonlight ribbon to embellish the card. 


Thank you for visiting my blog today and I hope you'll leave a comment in the space below. Please visit all the other demonstrators' cards by selecting the next person on the list.

Saturday, March 20, 2021

Casually Crafting Design Team March 2021

                           Welcome to the March Casually Crafting Design Team Blog Hop


We are a group of demonstrators from around the world sharing simple but awesome card designs that can be made using designer series paper, stamp sets, ink, punches, and  embellishments.  Our hope is that you will use one of our card designs and the materials you already have to create cards to send to your friends and family. Who doesn't love to receive a handmade card with a special note in the mail! 😍

I'm so happy to be a new member of the Casually Crafting Design Team! This will be my first month designing a card for this group and I hope you like my samples. I'll start with a simple design using the Sweet Strawberry Stamp Set, Strawberry Builder Punch, Berry Delightful Designer Series Paper, Circle Punch (2.25"), Real Red Satin Ribbon, and Red Rhinestones.


To make the card,

  • Cut a 4.25" x 11.0" Real Red cardstock and score at 5.5". Use a bone folder to make a crisp fold on the score line. This will be your cardbase.
  • Cut out a 2.5" x 5.25" piece of strawberry designer paper and attach it to the right-hand side of the card front using your favorite adhesive.
  • Cut out a 1.5" x 5.25" piece of green plaid designer paper and attach it to the left-hand side of the card front using your favorite adhesive.
  • Use the 2.25" circle punch and cut out a circle out of Basic White cardstock.
  • Stamp the sentiment "That was so sweet of you" from the Sweet Strawberry Stamp Set onto the Basic White circle using Real Red ink.
  • Make a loop with a 6.0" strip of Satin Real Red ribbon and attach it to the back of the Basic White circle using tape or glue dots.
  • Use the Strawberry Builder punch to cut out a strawberry top stem using Mossy Meadow cardstock.
  • Use the Strawberry Builder punch to cut out 4 strawberries using the designer series paper.
  • Fold each of the 4 strawberries in half and attach them to one another using multipurpose glue. This will be the 3-D Strawberry.
  • Attach the Strawberry Top Stem and assembled 3-D Strawberry onto the Basic White circle using multi-purpose glue.
  • Attach the Basic White circle to the card front using dimensionals.
  • Add three Real Red Rhinestones to the Basic White circle.


Inside the Card,
  • Cut a 4.0" x 5.25" piece of Basic White cardstock and attach it to the inside of the card using your favorite adhesive.
  • Attach a 0.75" x 5.25" strip of Strawberry designer series paper to the left-hand side of the Basic White cardstock.

If you have the Greenery Embossing Folder, the Layer Circle Dies, and the Stampin' Cut and Emboss Machine you can update the original design to make this card. All the measurements are the same.  

Changes include:

  • Use the Greenery Embossing Folder and Stampin' Cut and Emboss Machine to emboss leaves onto Garden Green cardstock and attach it to the left-hand side of the card front using your favorite adhesive.
  • Use the Layer Circle Dies and the Stampin' cut and Emboss Machine to cut out a 2.25" circle out of Basic White cardstock and a 2.50"scalloped circle using Real Red cardstock.
  • Attach the Basic White circle to the Real Red scalloped circle with your favorite adhesive.
Here is the revised card:


You are on Susan Schultz's Sea Ranch Creations blog. You may be starting here or have come from someone else's blog - see the list below to help you to visit all the different demonstrators' blogs and get many amazing ideas. 

Thank you so much for visiting our Casually Crafting Blog Hop!
Susan

Thursday, March 18, 2021

Easter Blog Hop March 2021

 Welcome to our Easter Blog Hop! 


We are a group demonstrators from around the world that have created multiple cards and projects to inspire your Easter creations. As you visit each demonstrator's blog think about how you might take these ideas and create your own cards or projects.

I just love the Hydrangea Hill Designer Series paper and I used the Arrange A Wreath Bundle to create this Easter Easel Card for share with you.


To make this card,

  • Fold a 4.25" x 11.0" Highland Heather cardstock scored at 3.0" and 5.5". Use a bone folder to make two crisp folds on the score lines. This is your base card.
  • Attach one 4.0" x 5.25" Goregous Grape cardstock (Layer 1) to the bottom flap of the front of the card using your favorite adhesive. Do not attach the top of the Goregous Grape cardstock to the front of the card.
  • Use Tin Tile Embossing Folder and the Stampin' Cut and Emboss Machine to emboss a Purple Posy cardstock.
  • Attach the embossed Purple Posy cardstock (Layer 2) to the Goregous Grape cardstock (Layer 1) using your favorite adhesive.
  • Use the two wreath dies and the Stampin' Cut and Emboss Machine to cut one wreath in Shaded Spruce cardstock and another wreath in Granny Apple Green cardstock.
  • Attach the two wreaths to the front of the Embossed Purple Posy cardstock (Layer 2) using your favorite adhesive.
  • Stamp three eggs onto Seaside Spray cardstock using Misty Moonlight ink and three eggs onto Highland Heather using Goregous Grape ink.
  • Use the egg dies from the Wreath Builder Die and the Stampin' Cut and Emboss Machine to cut out all the stamped eggs.
  • Attach the eggs to the wreath using dimensionals.
  • Use the two bow dies from the Wreath Builder Dies to make a double bow out of Goregous Grape cardstock.
  • Attach the two bows together using dimensionals on the bottom of the wreath.
  • Add a Highland Heather pearl from the Pastel Pearl pack.

Inside the Card
  • Attach a second piece of  4.0" x 5.25" Goregous Grape cardstock to the inside of the card using your favorite adhesive.
  • Attach a second piece of the 3.75" x 5.0" Purple Posy cardstock to the top of the Goregous Grape cardstock using your favorite adhesive.
  • Attach a 1.5" x 3.5" piece of Hydrangea Hill Designer Series paper to the bottom of the Purple Posy cardstock.
  • Use the small rectangle die from the Stitched So Sweetly Dies and the Stampin' Cut and Emboss Machine to cut out a rectangle out of Seaside Spray cardstock.
  • Stamp the Seaside Spray stitched rectangle with "Easter is a lovely reminder of new beginnings" sentiment from the Springtime Joy Stamp Set using Goregous Grape ink.
  • Attach the sentiment in the top center othe Hrdrangea Hill Designer Series Paper using Dimensionals.
If you live in the USA and don't already have a demonstrator, I'd be honored if you place an order through my on-line storeIf you purchase $50 or more, I will mail you a handmade Thank You card and email you the Creativity Abounds Hydrangea Hill Tutorial Bundle as a  gift from me. If you are a demonstrator or not interested in buying products, you can purchase the Hydrangea Hill Tutorial Bundle for $15 email me at ses@aquarius.family

Here is a sneak peek:


You are on Susan Schultz's Sea Ranch Creations blog. You may be starting here or have come from someone else's blog - see the list below to help you to visit all the different demonstrators' blogs and get many amazing ideas. 

Thank you so much for visiting our Easter Blog Hop!
Susan

Blog Hop

Wednesday, March 17, 2021

Creativity Abounds Blog Hop - March 2021

Welcome to the Creativity Abounds Design Team's March Blog Hop! 

We are a group of talented Stampin’ Up!® Demonstrators from around the world that are coming together to share our creative ideas with you. We are happy that you can join us and hope that we can inspire you to make creations of your own.


This month the team is featuring the Hydrangea Haven Bundle and the Hydrangea Hill Designer Series Paper. I just love the colors in this designer series paper - Rococo Rose, Seaside Spray, Highland Heather, and Gorgeous Grape. The Gorgeous Grape Sheer Ribbon and Pastel Pearls embellishments in this suite are also amazing.


To make this card, 

  • Fold the 5.5" x 8.5" Highland Heather cardstock in half and make a crisp fold with the bone folder. This is your cardbase.
  • Attach 5.0" Goregous Grape Sheer Ribbon around the bottom 1.0" of the Seaside Spray cardstock (Layer 1) using your favorite adhesive.
  • Attach the Seaside Spray (Layer 1) to the card base using your favorite adhesive.
  • Attach four 1.75" x 1.75" squares of Hydrangea Hill Designer Series paper to a 3.75" x 3.75" square of Goregous Grape cardstock (Layer 2) using your favorite adhesive.
  • Attach the Gorgeous Grape cardstock (Layer 2) to the Seaside Spray (Layer 1) using your favorite adhesive.
  • Use the textured Hydrangea Flower die and the Stampin Cut and Emboss Machine to cut out a flower using Seaside Spray cardstock. 
  • Use the two leaf dies and the Stampin Cut and Emboss Machine to cut out two large leaves and two small leaves using the Apple Granny Green cardstock for the bottom of the leaves and Mossy Meadow cardstock for the leaf highlights.
  • Attach the leaves to the back of the Hydrangea Flower die and attach the Hydrangea Flower to the center of the card using dimensionals.
  • Stamp the "You make me smile" sentiment from the Hydrangea Haven Stamp set onto  Seaside Spray cardstock using Gorgeous Grape ink.
  • Use the small rectangle from the Sitched So Sweetly Die and the Stampin Cut and Emboss Machine to cut a rectangle out of Seaside Spray cardstock.
  • Attach the sentiment to the center of the Goregous Grape Sheer Ribbon using dimensionals.
  • Use the flower border die from the Hydrangea Dies and the Stampin Cut and Emboss Machine to cut out petals in Highland Heather and Seaside Spray.
  • Attach two Highland Heather and two Seaside Spray petals using your favorite adhesive.
  • Add rhinestones to the center of each petal.


Inside the Card
  • Attach a strip of Hydrangea Hill designer series paper to the right-hand side of the Purple Posy cardstock.
  • Attach the Purple Posy cardstock to the inside of the card with your favorite adhesive

If you live in the USA and don't already have a demonstrator, I'd be honored if you place an order through my on-line storeIf you purchase $50 or more, I will mail you a handmade Thank You card and email you the Creativity Abounds Hydrangea Hill Tutorial Bundle as a free gift from me. If you are a demonstrator or not interested in buying products, you can purchase the Hydrangea Hill Tutorial Bundle for $15 email me at ses@aquarius.family

Here is a sneak peek:


You are on Susan Schultz's Sea Ranch Creations blog. You may be starting here or have come from someone else's blog - see the list below to help you to visit all the different demonstrators' blogs and get many amazing ideas. 

Thank you so much for checking out our March Blog Hop!
Susan

Blog Hop List


Monday, March 15, 2021

Monthly Blog Hop (March, 2021)


Thank you for joining us for our Kylie's Demonstrator Training Program Monthly Blog Hop! We are so happy that you could visit us today for this blog hop for ideas and creative inspiration. We are a group of Stampin' Up!® Demonstrators from around the world that are taking part in a monthly blog hop.

My Customer Thank You card this month features the Hydrangea Hill Designer Series Paper. I'm in love with the Hydrangea Hill Designer Series paper and the Hydrangea Haven Bundle. The designer series paper contains all of my favorite colors: Rococo Rose, Seascape Spray, Highland Heather, and Goregous Grape.  Rococo Rose and Seascape Spray are colors that will both retire soon so please get any supplies using these colors while supplies last.


I really like how the Tin Tile 3-D Embossing Folder provides an interesting background for the card and highlights the designer series paper. I used the Peaceful Moments Stamp Set and the Stitched Shapes Dies to make the sentiment. To embellish the card, I used the Silver Metallic Edged Ribbon and the Gorgeous Grape Pearls from the Pastel Pearl collection. 


I decorated the inside of the card with a piece of Purple Posy cardstock which is also retiring soon and a strip of Hydrangea Hill Desinger Series Paper. If you like the Hydrangea Hill Suite, visit my blog thoughout this week as I will be showcasing this suite with a variety of different card designs.

Remember if you place an order with me in March 2021 you are going to recieve this thank you card for your purchase as well as the Creativity Abounds Hydrangea Hill Tutorial Bundle as a gift. 

The Creativity Abounds Design Team is made up of 13 demonstrators from across the world and we come together each month to create exclusive tutorials and participate in a monthly Blog Hop. Visit my blog this Wednesday to see all the amazing card and project ideas designed by these talented demonstrators.


Thanks so much for stopping by today! This is a blog hop so make sure you 'hop' around to all the amazing projects on this hop! Click on the links below to visit them.

Happy Stamping!
Susan

Blog Hop