Wednesday, June 30, 2021
Crafty Challenge Blog Hop - June 2021
Sunday, June 27, 2021
Share It Sunday Blog Hop - June 2021
The Crafty Collaborations team is comprised of Stampin’ Up! Demonstrators from around the world. Each month, we participate in several collaborative projects including blog hops, like this one, to inspire all of us in our passion for crafting. Our goal is to create, share, and inspire others to keep our creative energy flowing.
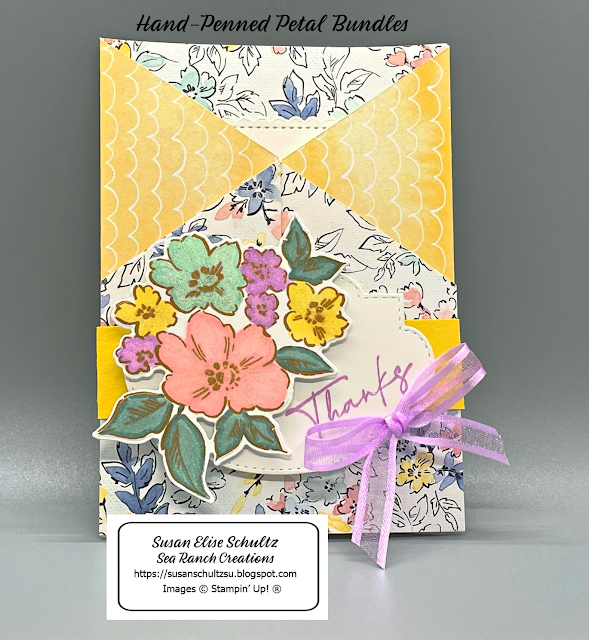
Today's creation is a Zig Zag Fun Fold card inspired by an awesome papercrafter, Diane Evans. She makes crafting so much fun. It's an amazing feeling when you can use some cardstock, stamps, ink, and designer series paper to create an incredible card that makes people smile. I hope this card will put a smile on your face!
To make this card:
- Fold a 5.5" x 12.0" Hand-Penned Designer Series paper and score on the horizontal side at 2.0", 4.0", 8.0", and 10". Use a bone folder to make a crisp fold at each score.
- Make a pencil mark at 2.75" on each side of the scored Hand-Penned Designer Series paper.
- Use your Trimmer to make a diagonal cut from the 2.0" score line to the 2.75" pencil mark. Make a second cut between the 8.0" score line to the 2.75" pencil mark on the other side of the paper.
- Use a bone folder to make a crisp fold at each score line.
- Cut out the Largest Rectangle Die from the Stitched So Sweetly Dies and the Stampin' Cut and Emboss Machine to cut out a large rectangle out of Basic White cardstock.
- Attach the Stitched Large Rectangle to the inside of the card using your favorite adhesive.
- Make a belly band out of a 1.0" x 9.0" Daffodil Delight cardstock and bend it around the middle of the card.
- Attach the Daffodil Delight belly band in the front of the card front using your favorite adhesive.
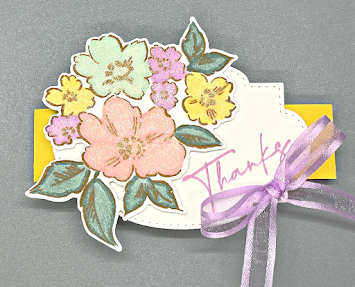
- Stamp the "Thanks" sentiment from the Hand-Penned Petal Stamp set onto Basic White cardstock using Fresh Freesia ink.
- Use the large sentiment die from the Stitched So Sweetly Dies and the Stampin' Cut and Emboss Machine to cut the sentiment.
- Attach the sentiment to the belly band using dimensionals.
- Stamp the Flower Arrangement from the Hand-Penned Petal Stamp set onto a piece of Basic White cardstock using Cinnamon Cider ink.
- Use Blushing Bride, Daffodil Delight, Mint Macaroon, Highland Heather, and Soft Succulent Blends.
- Use the Flower Arrangement Dies from the Penned Dies and the Stampin' Cut and Emboss Machine to cut out the flower arrangement.
- Tie a bow out of 8" of Fresh Freesia Ribbon and attach with a glue dot.
Thank you for visiting my blog - Sea Ranch Creations today! Please be sure to "hop" along the list to see amazing creations from other demonstrators.
Happy Stamping!
Susan
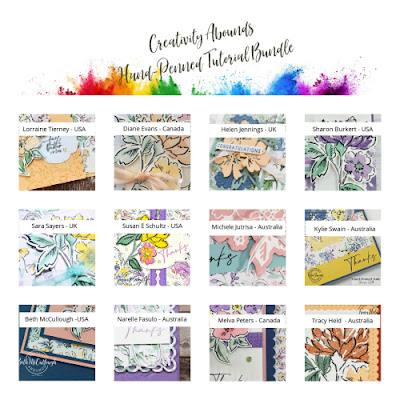
Place a $50 or more order on my Online Store and use the Host Code WS3W4ERY to receive a beautiful Thank You card and the Creativity Abounds Design Team Hand-Penned Tutorial Bundle. You're going to love these cards.
Thursday, June 24, 2021
Ink and Inspiration Blog Hop - Let Your Colors Shine (June 2021)
This group is made up of Stampin' Up Demonstrators from around the world and our goal is to inspire folks to share their special talents to make and send cards to family and friends.
Blog Hop
Place a $50 or more order on my Online Store and use the Host Code WS3W4ERY to receive a beautiful Thank You card and the Creativity Abounds Design Team Hand-Penned Tutorial Bundle. You're going to love these cards.
Wednesday, June 23, 2021
Free Stampin' Up Shipping Special - June 24th Only
Hello Crafting Friends,
Stampin' Up is offering FREE SHIPPING on any $50 or more order for 24 hours beginning tonight, June 23 at 11pm PST and ending on June 24 at 11pm PST.
This is a great time to take advantage of FREE SHIPPING! There are still bargains to be had in the Last Chance which has retiring products until June 30th. Also check out Clearance Items.
If you place an order on my Online Store and use the Host Code,WS3W4ERY, you will receive a Thank You card and a Fancy Fold Tutorial as gifts from me. The Fancy Fold Tutorial contains 30 Fun Fold Card Ideas complete with photos and step-by-step instructions
Please email me at ses@aquarius.family if you have any questions
Susan
Saturday, June 19, 2021
Casually Crafting Blog Hop - June 2021
This month our team will be creating cards inspired by this Tic Tac Toe Challenge. Our cards need to contain all the elements listed in a vertical line or horizontal line or diagonal line. As you're looking at each card, go back to the challenge to see what collection of items the designer used to create their card.
I used the Hand-Penned Suite to create my card. This suite includes the Hand-Penned Petals Bundle, the Hand-Penned Designer Series Paper, and the Genial Gems. I also used Basic White cardstock, Granny Apple Green cardstock, Misty Moonlight cardstock, Granny Apple Green ink, Misty Moonlight ink, Tailored Tag Punch, and Pal Papaya Ribbon.
Measurements:
Card Base
(Granny Apple Green): 5.5" x 8.5" scored at 1.25" and 4.25"
Insert (Basic White): 4.0"
x 5.25"
Strip (Misty
Moonlight): 1.0” x 5.5”
Hand-Penned Designer Series Paper: 2.75” x 5.25”
Sentiment (Basic White and Granny Apple Green): scraps
To Make Card:
- Fold the Granny Apple Green card base on the two score lines and use a bone folder to make a crisp fold. At the 1.25" score mark, fold the right-hand side of card front back towards the middle of the card front.
- Add Hand-Penned Designer Series paper to the front of the card base using your favorite adhesive.
- Attach the strip of Misty Moonlight cardstock to the middle of the front flap using your favorite adhesive.
- Stamp the flower along the right-hand side of the Basic White cardstock using Granny Apple Green ink.
- Attach the stamped Basic White cardstock to the inside of the card using your favorite adhesive.
- Use the Tailored Tag Punch to cut out a Basic White and Granny Apple Green tags.
- Cut the Granny Apple Green tag in half along the horizontal axis.
- Attach the two Granny Apple Green tag pieces to the top and bottom of the Basic White tag using your favorite adhesive.
- Stamp the "Thanks" sentiment from the Hand-Penned Petals Stamp set to the Basic White tag using Misty Moonlight ink.
- Tie a bow out of 10" of Pale Papaya Ribbon and attach to the center of the Misty Moonlight strip using a glue dot.
- Attach the stamped sentiment just below the bow using dimensionals. Be sure to only use dimensionals on the left-hand side of the sentiment so the card will open.
- Add a few Pale Papaya Genial Gems to the sentiment.
Thank you so much for visiting my blog - Sea Ranch Creations. Please take some time and "hop" to see the amazing cards designed by other members of our team. I know they will inspire you with their creativity.
Happy Stamping!
Susan
Blog Hop
Place a $50 or more order on my Online Store and use the Host Code WS3W4ERY to receive a beautiful Thank You card and the Creativity Abounds Design Team Hand-Penned Tutorial Bundle. You're going to love these cards.
If you purchased the Hand-Penned Suite from me in May or June you will get this Tutorial Bundle as part of our Hand-Penned Stamp Camp along with your 9 make and takes. I can't wait for our sessions the evening of June 25 and all day on June 26th. All sessions will be recorded so you can watch them anytime.
Wednesday, June 16, 2021
Creativity Abounds Design Team Blog Hop - June 2021
Here are the amazing Stampin' Up Demonstrators in our Creativity Abounds Design Team! If you've been following my blog, I'm sure you've already fallen in love with these remarkable ladies.
- Take a piece of 8.5" x 11.0" Just Jade cardstock.
- Place the short end of the cardstock at the top of your trimmer and score at 4.25"
- Turn the paper so the long end of the cardstock is at the top of your trimmer and score at 5.5"
- Cut the paper on the diagonal so you have two pieces that both look like this. (See Photo A below).
- Use your bone folder to make crisp folds on both score lines.
- Take a piece of 4.0" x 5.25" Hand-Penned Designer Series paper and cut on a diagonal.
- Attach the two cut pieces of Hand-Penned Designer Series paper to the flaps on the front of the card using your favorite adhesive.
- Take a piece of 4.0" x 5.25" Basic White cardstock and attach it to the inside of the card using your favorite adhesive.
- Use the flowers and leaves from the Penned Flowers Die set and the Stampin' Cut and Emboss Machine to cut out two flowers using Polished Pink cardstock and leaves using Just Jade.
- Attach the flowers and leaves to the bottom of the Basic White cardstock using your favorite adhesive and dimensionals.
- Add two small pearls to the center of the Pink Polished flowers (See Photo B below).
- Use the Stitched So Sweetly die and the Stampin' Cut and Emboss Machine to cut out a scalloped rectangle out of Basic White cardstock.
- Stamp the bottom of the scalloped rectangle with the "Thanks" sentiment from the Hand-Penned Petal Stamp set using Cinnamon Cider ink.
- Stamp the flower arrangement from the Hand-Penned Stamp set onto the upper portion of the scalloped rectangle using Cinnamon Cider ink.
- Color the flowers with Daffodil Delight and Polished Pink markers. Then color the leaves with a Just Jade marker.
- Add a pearl to the middle of the Polished Pink flower.
- Take an 18" piece of Pale Papaya Ribbon and color with Daffodil Delight blends OR use a sponge to wipe the ribbon with Daffodil Delight ink and let it dry.
- Tie the Daffodil Delight Ribbon into a bow on the side of the card.
- Attach the scalloped rectangle with the colored image to the top of the card using dimensionals only on the upper right-hand side so the card will open when someone unties the bow.
 |
| Photo A - One of the Fun Fold cards. |
Thank you for visiting my blog - Sea Ranch Creations today! I hope you will take time to 'hop' around the links to see all the beautiful cards from the Creativity Abounds Team. I know you're going to love their designs!
Happy Stamping!
Susan
Registration ENDS today!
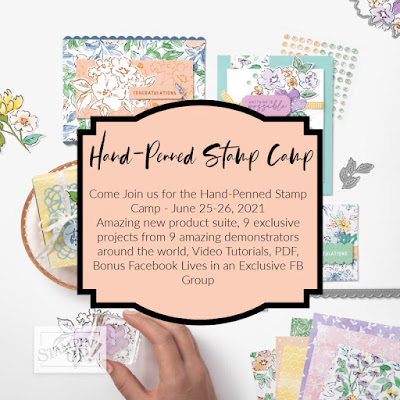
Are you ready for 9 amazing projects featuring the Hand-Penned Suite? Join me and some incredibly talented friends from the International Creativity Abounds Design Team on June 25th and 26th for our first stamp camp featuring the Hand-Penned Product Suite!
Your Hand-Penned Stamp Camp includes:
- The Hand-Penned Petals Bundle, Hand-Penned 12”x12” Designer Series Paper and Genial Gems!
- Make and Takes* for 9 projects and an awesome PDF for you to follow along while creating
- YouTube videos for each of the projects for your reference
- Access to an exclusive FB group where additional LIVE presentations will be held during the 2 days weekend (you can watch later, as well)!
*Card stock will be prepped and ready for you with any of the die-cutting done that is not using your bundle.
*You will provide your own ink and adhesive and will use the Designer Series Paper and Genial Gems from your purchased suite.
*Your kit will include cardstock for you to stamp on, but you will do the die cutting.
I hope you join in the fun with us! This is such a beautiful product suite and you are going to love how versatile it is!
How do you register for the event?
Simply head to my Online Store and use the Host Code WS3W4ERY to purchase the Hand-Penned Suite (Item 155503 – $66.25). Note: You need the suite to complete the make and takes! Your purchase of the Hand-Penned Suite is your ticket to the event and the make-n-takes.
Monday, June 14, 2021
Monthly Blog Hop - June 2021
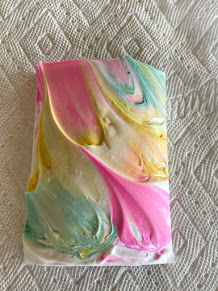
Step 1: Squirt a small amount of shaving cream into the container or plate. Use the knife to smooth the top of the shaving cream.
Blog Hop
Your Hand-Penned Stamp Camp includes:
- The Hand-Penned Petals Bundle, Hand-Penned 12”x12” Designer Series Paper and Genial Gems!
- Make and Takes* for 9 projects and an awesome PDF for you to follow along while creating
- YouTube videos for each of the projects for your reference
- Access to an exclusive FB group where additional LIVE presentations will be held during the 2 days weekend (you can watch later, as well)!
*Card stock will be prepped and ready for you with any of the die-cutting done that is not using your bundle.
*You will provide your own ink and adhesive and will use the Designer Series Paper and Genial Gems from your purchased suite.
*Your kit will include cardstock for you to stamp on, but you will do the die cutting.
I hope you join in the fun with us! This is such a beautiful product suite and you are going to love how versatile it is!
Registration ENDS June 15th and the Make-n-Take kit is estimated to ship by June 16th. The Hand-Penned Suite is on Low Inventory so please order yours today before it’s too late!
How do you register for the event?
Simply head to my Online Store and use the Host Code WS3W4ERY to purchase the Hand-Penned Suite (Item 155503 – $66.25). Note: You need the suite to complete the make and takes! Your purchase of the Hand-Penned Suite is your ticket to the event and the make-n-takes.
Thursday, June 10, 2021
Stampin' Dreams Blog Hop - Fun Folds (June 2021)
Welcome to the June Stampin' Dreams Blog Hop. We're a group of Stampin' Up Demonstrators from across the world who participate in this Blog Hop to share new techniques and to inspire others to make cards. This month we are focusing on Fun Fold cards. I know you're going to learn many new Fun Fold card ideas from the group.
I created this Fun Fold card using the Hand-Penned Petals Bundle, Layering Circles Dies, the Everyday Label Punch, and the Tasteful Textile Embossing Folder.
Do you want the instructions for making the card? Place an order with me for $50 or more and you'll receive a Thank You card as well as the Fancy Fold Tutorial Bundle as a gift. Thirty Stampin' Up Demonstrators from around the world submitted Fun Fold Cards to produce this Fancy Fold Tutorial Bundle. The designs are incredible and I know you will want to get your hands on these PDF Tutorials.
Are you ready for 9 amazing projects featuring the Hand-Penned Suite? Join me and some incredibly talented friends from the International Creativity Abounds Design Team on June 25th and 26th for our first stamp camp featuring the Hand-Penned Product Suite!
Your Hand-Penned Stamp Camp includes:
- The Hand-Penned Petals Bundle, Hand-Penned 12”x12” Designer Series Paper and Genial Gems!
- Make and Takes* for 9 projects and an awesome PDF for you to follow along while creating
- YouTube videos for each of the projects for your reference
- Access to an exclusive FB group where additional LIVE presentations will be held during the 2 days weekend (you can watch later, as well)!
*Card stock will be prepped and ready for you with any of the die-cutting done that is not using your bundle.
*You will provide your own ink and adhesive and will use the Designer Series Paper and Genial Gems from your purchased suite.
*Your kit will include cardstock for you to stamp on, but you will do the die cutting.
I hope you join in the fun with us! This is such a beautiful product suite and you are going to love how versatile it is!
Registration ENDS June 12th and the Make-n-Take kit is estimated to ship by June 14th. The Hand-Penned Suite is on Low Inventory so please order yours today before it’s too late!
How do you register for the event?
Simply head to my Online Store and use the Host Code MEY4EGVZ to purchase the Hand-Penned Suite (Item 155503 – $66.25). Note: You need the suite to complete the make and takes! Your purchase of the Hand-Penned Suite is your ticket to the event and the make-n-takes.
Tuesday, June 8, 2021
Techniques Tuesday Blog Hop - Embossing (June 2021)
Welcome to Our Tuesday Tips for June! We're a group of Stampin' Up Demonstrators from around the world who come together to share our creations with the goal of inspiring others. This month we are sharing different techniques for embossing. I hope you will learn some new techniques to try in the future.
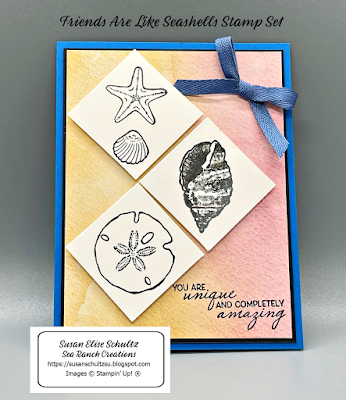
I created my card using the Friends Are Like Seashells Bundle and the Seashells Embossing Folder. I truly love this collection of products. The stamp sets has some wonderful images and sentiments as I love the ocean. However the dies and embossing folder really turn regular cards into WOW cards.
I used my blending brushes to create a background using lightly inked Misty Moonlight and Blushing Bride. Once I had the background completed, I put the paper into the 3-D Seashells Embossing Folder AND I placed the die set into the embossing folder as well. I ran the package through my Stampin' Cut and Emboss Machine. The paper was embossed and cut at the same time! I really love the effect and not having to worry about lining up the dies after it was already embossed. So I'd suggest that you try this technique:
- Add the paper to be embossed into the embossing folder
- Place the dies on top of the paper and make sure they are in the proper alignment
- Close the embossing folder
- Run the 'package' through the Stampin' Cut and Emboss Machine
Thank you for visiting my blog - Sea Ranch Creations. Please check out all the other amazing cards by the other demonstrators in this group by clicking onto their links below.
Happy Stamping!
Susan


